
Add evidence with an expiration date
Add an evidence item, set an expiration date, and read its review status.
Applies to Admin
The Evidence library is the list of compliance items for CyberAssure. Each item has a status and can have an expiration date.
The status tells you where review stands: Pending, Reviewed, Approved, Rejected, or Expired. This page does not include an Approve or Reject button. You add the item here. The status shows the review state after it changes.
Add an item#
- Open Evidence. Choose Add Evidence.
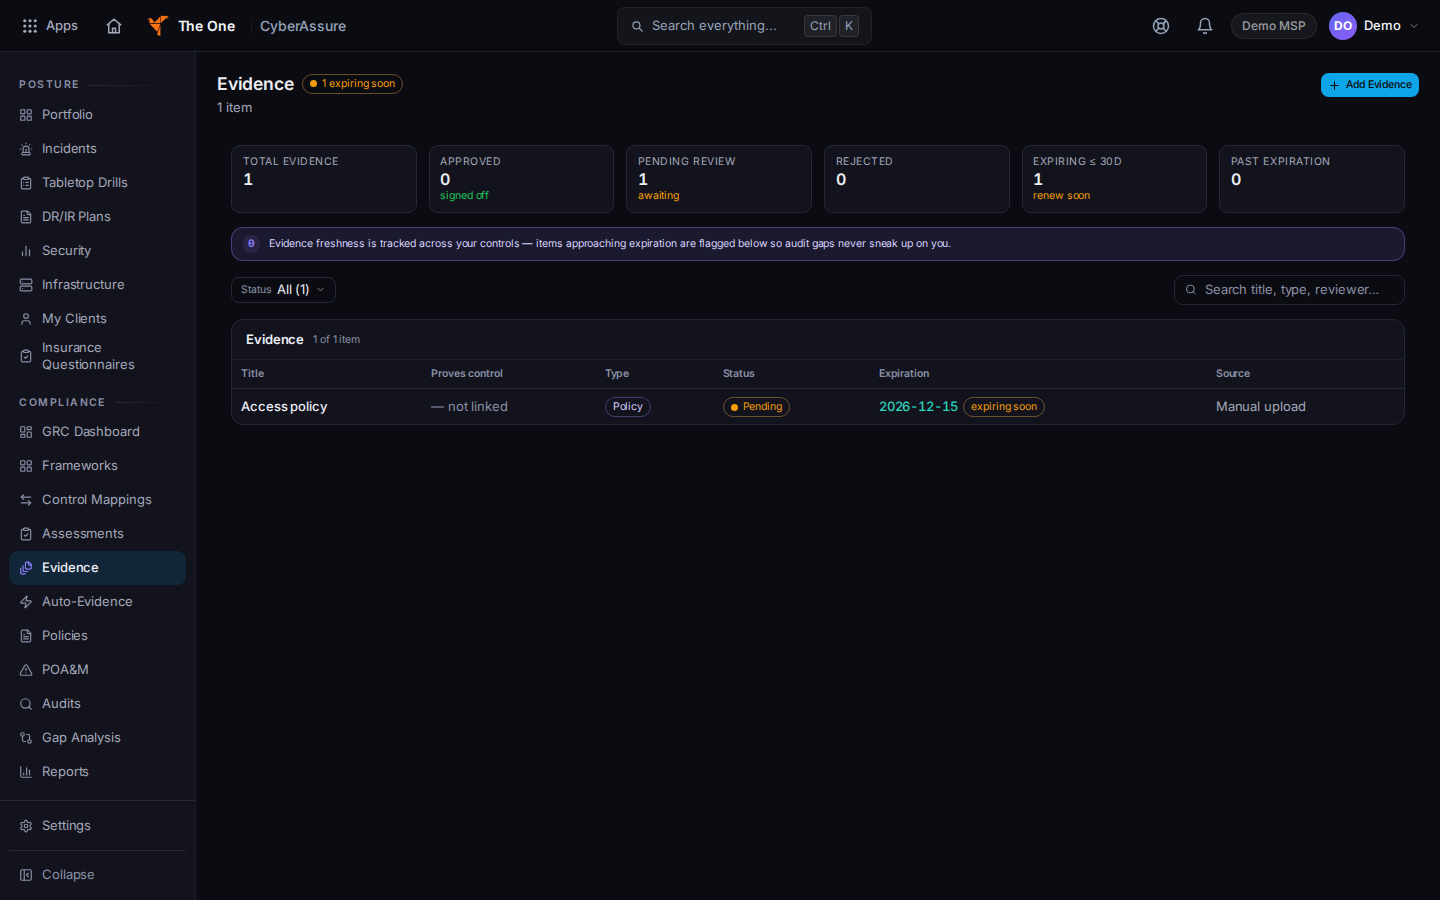
The Evidence library, with an expiration date and Add Evidence - Fill Title and Source. Both are required.
- Set Expiration Date when the item should expire. Leave it blank only if you have no date yet.
- Choose a Type if you need one: document, policy, screenshot, configuration, report, attestation, log, or other.
- Choose Proves control when the item maps to a control. If the list says No controls yet, adopt a framework first. Not linked to a control is allowed.
- Choose Add Evidence. While it saves, the button reads Adding…. Choose Cancel to close the form.
The library tiles include Total evidence, Approved, Pending review, Rejected, Expiring ≤ 30d, and Past expiration.
The Expiration column shows the date. A date inside 30 days is marked expiring soon. A past date is marked expired.
Filter Status to see one state. The search box filters the title, type, and source on the page.
If it goes wrong#
- Title is required. Or Failed to add evidence. Fill Title and Source, then try again.
- Failed to load evidence. Reload. A failed load is not an empty library. Do not trust a zero count on a failed read.
- Linked control unavailable. The item points at a control the page could not resolve. Do not read that as "not linked."
What's next#
Was this article helpful?